Hi and welcome! I am excited to share my cards with you this month. I was challenged with this theme of kraft, black and white. Limited to a “colorless” card made me want to use color! I had to think about technique and design. I love black and white because of the sharp contrast, but adding kraft threw me a bit of a curve ball…. and the funny part is that I love kraft too!
Card #1 ~Good Times
This card reminds me of a dance party where these two are getting to know each other. I thought it might be fun to use the 2nd generation technique where an image is inked once and stamped repeatedly without reinking. To create this card I stamped the man and woman silhouette images with Hero Hues unicorn kraft ink. Next the images can be stamped immediately on the base without reinking. (For this card,I actually reinked the images and stamped on a separate scrap once to throw out the darkest. I did this because I wanted to place the original images exactly where I wanted them and inadvertently cleaned off the ink to do this.) Then I stamped the sentiment, cut it into two, and added a very thin border of kraft. I glued them at an angle to create a sense of movement. Finally I added iridescent sequins.
A thin accent of kraft bordering the sentiment.
“Your My Happy” Layers of Life by Unity Stamp Company
The second man is tilted forward a bit. This was unplanned and I was going to start over but decided it adds interest and breaks up the repeated lines!
Card #2 ~ A Beautiful Birthday
This card is traditional. A beautiful floral image does not need a whole lot. I love that it is a corner image and so large as if it is blooming in front of our eyes! To create this card I stamped the floral image on white cardstock. Next I framed it on black paper. Then I adhered it to the kraft card base. I embossed the sentiment in white on black and popped it up with dimensionals. Finally I tied a bow with two lengths of burlap string and added a clear jewel embellishment.
A close-up. I love the detail of this floral image.
“Wildflower” Corner by Unity Stamp Company
Black and white cards are sharp and bold with the contrast. Kraft adds a touch of an organic natural element.
Card #3 ~ Those were the days!
This card is inspired by vintage photographs. I took a summer scene and turned it into a cloudy evening for something different, unique and interesting! To create thiscard I stamped the image in Versamark Ink and heat embossed it with clear embossing powder. Next I ink blended Hero Hues unicorn kraft ink over the top. Then I die cut the image to give it a torn look and framed it up with white and kraft. Finally I used one layer of burlap string and placed the bow on the lower portion of the card for balance.I also went over the figures with a black marker to make the images stand out.
“Good Day Sun Shine” by Authentique Paper for Unity Stamp Company
A look at the children close up. It was fun experimenting with how much white ink to leave or to wipe away.
A mix of past and present. I love this sentiment with two fonts, I only used half because the other part reads “sun shine” and I didn’t feel this card displayed that kind of a day. We can leave that up to the viewer to decide!
Card #4 ~ Typewritten love and friendship
This typewriter is amazing and has so many possibilities. I love the size and the detailed lines. To create this card I stamped the image with Versafine ink on kraft. Next I stamped the sentiment in the middle of the card with Versamark ink. Then I sprinkled white embossing powder over the sentiment and let it go over onto the image. Versafine ink canbe used for embossing, I often forget! I might have forgotten on this card….happy accident! Then I ink blended black soot around the edge of the card and painted a shadow for the typewriter.Finally I stamped the sentiment at the top in black and saved the last word for the lower right corner. I also added a clear bubble embellishment to finish the card.
“Our Blooming Story” by Angie Blom for Unity Stamp Company
This sentiment might be difficult to read. I love the effect! I separated the sentiment and stamped at top and bottom in black.
This image is really large and I just love the flowers popping out of the top of the vintage typewriter!
Supplies I used. I put them all together in one frame because the items I used to create overlapped and repeated for most of the cards.
My cards for this month. Kraft, Black and White.
I hope you found some new and fun ideas to try out with this color scheme. Please comment below and hop along with our Friends of Unity! I will choose one person to receive a thank you prize for joining us! The winner will be announced at next month’s hop.
And now to announce the winner for February, Amanda Rhodes! Congratulations Amanda! Please message meyour mailing address and I will get your prize in the mail! Thank you so much for participating, we appreciate you!
As this hop comes to a close, our hearts are heavy with the atrocities taking place in Ukraine. There are no words to express the sadness I am feeling. This card is to show I stand with Ukraine. Please stay strong, I hope for peace…
Thanks for hopping! See you next month. Keep creating beautiful pieces of art.
Rachel
Please check out my short videos on Instagram and TikTok @cardartbyrachel.
Welcome! This month’s cue is a sketch. I love this exercise because it gives me an awesome starting point whether I am wrapped up in everyday business, feeling less motivated or maybe having a bit of a “creative block”. This is so helpful to get a jump start on cardmaking!I hope you get a chance to try this sketch out.
Card #1- A surprise special effect that’s out of this world!
Glow-in-the-dark embossing powder!!! What will they come up with next?! I was over the moon when I got this product and it’s my first time using it. These are the steps to create this card. 1. I masked the balloon with tape. 2. Next I stamped the image with Versafine black ink on watercolor paper. I heat embossed it with clear powder. This set the image. 3. Then I stamped and embossed the balloon with Lawn Fawn Glow in the dark powder!I can’t say enough about how much fun this effect is! 4.With metallic paints, I colored the space alien and then regular green for the cute monster. Metallic paints really add a space-like touch!5. Then I loosely blended distress oxide inks for the sky and planet. 6. I die cut the scene with a Gina Marie die. 7. I added a white strip of cardstock with coordinating washi tape 8. Finally I stamped the sentiment right on the tape.A little crooked, I decided to keep it and add white dots as if it was supposed to be that way! (tip-the ink smeared a bit so next time I will try stazon ink and heat set it). Actually the final step is holding the balloon up to a light. Then take it to a dark room to see the glow! Awesome!
Supplies I used
“Other Worldly Greetings”by Unity Stamp Company
Metallic watercolor on the alien’s suit!It really looks awesome in personand not somessy. :) Also I used vellum to extend the sentiment strip so that you could see the image underneath it.
Glow in the dark powder in action!This is a game changer for sure.
I stamped the top sentiment directly on the washi tape. It isn’t straight but I liked it and added white dots to take on a wavy look. Also I would use Stazon ink next time so it doesn’t smudge.
Card #2 – An elegant thinking of you
I love this floral and the hardest part was deciding what color my irises were going to be. I decided on my favorite color blue! 1. I die cut the watercolor paper with a beautiful Gina Marie Die.2. Next I stamped the image with Versafine ink and painted it with blueprint sketch distress inks. 3. Then I used a larger matching die and using one side of it, I cut a strip for the top of the card. 4. I stamped the sentiment on a piece of white paper, I watercolored prize ribbon over it and also mounted it on white. 5. Finally I tied ivory burlap string on the strip of paper and blended it with the same blue ink. I glued down just the top portion to give it a valance-like feel!
This reminds me of an eyelet valance!
Supplies I used
“Care and Hope Iris” by Sandya Iyerfor Unity Stamp Company
A card to send to almost anyone anytime when they need that little pick-me-up!
Card #3 – A sentimental Valentine’s Day card
A vintage kind of feel. I used two sets to make this card. 1. I tore the cardstock in a rectangular shape and stamped the envelope image on it. 2. Next I ink blended the edges with distress ink. 3. I stamped the quill pen in Versafine ink and embossed it with sparkly black glitter! 4. I die cut out an area at the top for interest and added red paper underneath. This step may have been skipped as it is hard to see. 5. Then I heat embossed the “your story” sentiment in maroon.6. Using vellum I stamped the “Love”sentiment and heat embossed it with gold. Three layers for thickness, I wrapped it around the edges and taped it to the back. 7. I added washi tape for interest and also to keep the vellum in place. 8. A cut out heart from a scrap of silver glitter foam added a sparkling final accent.
The feather pen embossed with sparkly black glitter powder.
Gold embossed love sentiment on vellum and a silver glitter heart cut from foam.
“All the Stories” and a layers of life kit by UnityStamp Company
Supplies I used
A take on Valentine’s day or great for any lovely occasion!
Card #4 – A worldy illusion
Maybe this is a window into the world?! A color palette with a very earthy natural feel. 1. First I taped the stencil on a white card base and blended oxide ink over the sphere. I used shabby shutters oxide ink on the remaining areas. This stencil is amazing and offers a 3D illusion.2. Next I stamped the world image in vintage photo and embossed it with clear powder. 3. I die cut a woodgrain frame by Hero Arts. It was a scrap with splattered white acrylic paint on it. 4. With gray washi tape, I covered a strip of white card stock and tied an olive organza ribbon on to soften the card. 5. Finally I stamped the sentiment and die cut a curvy edge. I blended coordinating colors around the edges.
I clear embossed the world to set the image and bring texture so it doesn’t disappear behind the frame.
Supplies I used
“Love brings you home” by Erin Schreiner for Unity Stamp Company
I love the sphere stencil! It is an optical illusion (Op Art) of a sphere with a strong 3D quality. You can reach out and grab it!
Thank you for hopping along with us, this was a fun sketch! Please hop to the next friend below to see tons of creativity and amazing ideas. Comment to win a “thank you” prize, the winner will be announced at next month’s hop.
And now for the winner of last month’s hop…….Shelley Middleton! Thank you so much for hopping! Congratulations!!!Please message me you mailing address and I will get your prizesent out to you!
Cards for the hop!
Until March brings us back together, may you stay safe and healthy while creating tons of amazing and beautiful cards. I am so very hopeful for all that comes with thoughts of spring and the beautiful blue skies that surround.
Please visit me on Instagram and TikTok @cardartbyrachel for fun short process videos of how I made these cards.
Hello and Happy New Year! I hope you bid a fine farewell to 2021 as we look straight ahead to 2022. The cue this month is CAS which stands for “clean and simple.” The best part about this cue, less is more. Most cards in this category I have found to be quick and easy to complete. A few guidelines when making my cards I followed were…leave a large amount of blank space, few layers, and little to no embellishments. Believe you me, it was not easy. I may just have to sneak a few burlap string and glitter on some of these cards when no one is looking!
Card #1
When I met my husband years ago, a new celebration important to his family became part of our tradition.Looking ahead to the Lunar New Year, I thought immediately of this stamp I won from Unity a few years back! 1. I stamped the image on heavy white card stock with Versafine ink. To create dimension, I unevenly applied ink to the stamp.(darker on the sides of each lantern) 2. Next I die cut the image at an angle on a square dotted die. 3. Then I cut a square to create a fine red border. 4. I stamped the sentiment on a strip of black cardstock and heat embossed it with Ranger gold embossing powder. 5. Finally I glued it all together to complete the card.
Supplies I used
Card #1 (b)
This card is less bright and dramatic, but I love the rich gold image and red ink on grey. 1. I heat embossed the image with Ranger gold embossing powder. 2. Next I die cut it out with a Gina Marie dotted rectangulardie. 3. I glued the die on the center of the card in landscape orientation. 4. Finally I stamped the sentiment inred ink.
Card #1 (c)
This card is mostly white with accents of black, gold and red. 1. I stamped the image directly on the cardbase making sure the ends of the image go off the page. 2. Next I stamped the sentiment in Versamark ink and heat embossed it with Stampstruck gold sparkly embossing powder. 3. I die cut the sentiment with the square dotted die and cut a fine layer border of red to go under it. 4. Finally I adhered the pieces together and that was it!
Card #2
I love this tiny image with a huge message! Colored pencils on kraft are pure magic. The colors seem to glow and illuminate on contact. 1. I die cut the stitched circle border on kraft. 2. Next I lightly penciled in where the circle will be placed on the card base. 3. Then I stamped the image with Versafine Ink and colored it with Berol Prismacolor pencils. Erase the pencil marking. 4. Finally I stamped the sentiment on the front and adhered it to the base.
Supplies I used. The little bear is an eraser!
Prismacolor pencils glow on kraft cardstock
Card #3
This card was mostly an experiment. I almost didn’t share it because I am unsure if I like it! I hope you find something about it appealing. I can picture many other color combinations. 1. First I attached the image to my Misti platform. Using four colors, I inked various parts of the image and repeatedly stamped the image. 2. Next I stamped the sentiment three times with different inks and the third I embossed with silver powder allowing the powder to also adhere to part of the heart image. 3. I added a splatter stamp on the top left and bottom of the image. 4. Finally I mounted the image on a white card base.
Silver embossing powder for the sentiment
Supplies I used
Card #4
I love this image! When I asked my daughter for her opinion about the card she said “it took me a second to tell what the picture is.” Maybe that’s ok. It encourages the viewer to take a moment longer to see it! Embossed in white this reminds me of Mark Tobey, an artist noted for his “white writing” style. 1. I stamped the image with Versafine ink and heat embossed it with Brutus Monroe alabaster powder. 2. Next I painted it with distress ink. I painted over it many times to keep the dark color on the edges. This is to define the lines and add contrast. 3. Then I stamped the sentiment with Stampin’ Up basic gray ink. 4. Finally I mounted it on a white card base.
White embossing powder and a charcoal grey sentiment.
Supplies I used
Card #5
A burst of bright yellow to say I forgot and hoping to make up for the shortcoming! This was fun to make. I love how bold the white lightbulb is on the card. 1. I stamped the lightbulb on white cardstock with Versafine Ink. 2. Next I fussy-cut it out and sponged a bit of yellow ink on the filament of the bulb. 3. Then I stenciled the sun rays in with the same yellow ink. It had a bit of orange still left on the sponge from past blending! 4. After that, I masked off part of the sentiment, arranged it on the Misti and stamped it down. I repeated this step with the lower half of the sentiment. 5. Finally I adhered the lightbulb to the card!
“Lightbulb Moment” by Lisa Arana for Unity Stamp Company
Supplies I used
A close-up. I used one sentiment and stamped it in two separate areasby taping off one line at a time.
I love a card base in yellow. It just screams energy and excitement!
Here is the list of the Friends of Unity blog links. Just click on the next person and it will take you right to their blog.
Thank you so much for hopping with us! Please don’t forget to leave a comment. I will draw a random person from the comments to receive a “thank you” prize. The winner will be announced on next month’s post.
Now to announce the winner from December….Jenni Shamblin! Congratulations Jenni, please message me your mailing address!
I so enjoyed the clean and simple cue. It’s refreshing getting back to basics and nice when wanting to make multiple cards. Also a true time saver with most of these cards too. Please let me know your thoughts and which one is your favorite. It would be fun to hear your least favorite too!
Please visit me on Instagram and TikTok @cardartbyrachel for short, fun process videos.
More clean and simple cards
One stamp used for 3 different cards
Have a wonderful start to the new year. May you be safe and healthy as we navigate throughthese winter months!
The cue this month is Retro/Vintage! There is something to be said about timeless treasures and memories from the past. A feeling of nostalgia and sentimentality is mostly heartwarming and beautiful.
Card #1~Remaining brave and confident
This image is thought provoking and inspirational. The bold contrast of the light hitting the image symbolizes hope through the shadowy darkness. I stamped the image in Versafine black ink on white cardstock, die cut out with a wonky stitched die. I heat embossed with clear powder to make it permanent as I wasn’t sure what my plans were for this card.Next I brushed distress ink on her face and the dress but left the areas where the light first meets her face.Then I brushed on ink around the edges and darkest areas on the left side of her face where it was the most shaded.I stamped the sentiment in black and then applied versamark ink on the lower half of the sentiment. I embossed this part with silver powder.Finally I used a dot stencil around the edges and a paintbrush dipped in water to add light specks around the image. I framed the image on a fine white border and distressed it with a scissor’s blade.
A contrast of light and dark
“You Will” by Jake Wangen & Joselyn Nielson for Unity Stamp Company
Supplies I used
Ranger liquid pearls could be added to the necklace and a few embellishments in the lower left hand corner such as a paper flower or a crystal.
Card #2~A letterpress inspired creation
I recently went to a letterpress class. I created this card to remind me of the simplicity and the little color used on a letterpress machine. Changing ink color requires cleaning rollers with a solvent and quite a bit of time. I stamped this awesome image of ornaments hanging on a tree with black Versafine ink. Next I stamped the sentiment on heavy cardstock and cut it out with a stitched square die.I framed it with a thin black border.Finally I adhered the image to a white card base.I could add an embellishment in the lower right corner but in keeping with the letterpress vision, I love it just the way it is!
“Holiday Things”
I love the simplicity!
Supplies I used
Card #3~Let there be laughter and beautiful memories
I’m always looking to try something different. I thought a scene might be creative with a close-up image inside a wall papered room. A window view looks outside to a lighted Christmas tree. I die cut the mini slimline with a Gina Marie die from patterned paper. I stamped the image right over the top. Next I used an Arts Impressions window die. I used distress ink to darken the window panes. On the cardstock I stamped the tree and star being careful to keep the colors separate. I blended distressink in the background. Using brown and black distress ink I also blended ink around the edges of the card base, the patterned paper and eventually the sentiment strip. Finally I added Stickles to the tree and star and burlap string to complete the card. I didn’t plan for the flower in the woman’s hair but it was a nice surprise!
“Lawd have mercy” by Joselyn Nielson for Unity Stamp Company
Supplies I usedLoving thecheerful anticipation of the holiday festivities!
Card #4~A warm, homemade hello
Memories of fresh baked Holiday cookies made by my mom every Christmas is what I thinkof when I see this image. I die cut the kraft cardstock with a scalloped Gina Marie die. I stamped it with Versamark ink and embossed with Ranger gold powder. I colored the gingerbread with Prismacolor pencils and embellished it with Ranger liquid pearls for the buttons, Stickles for the bow tie and glitter glue for the eyes. I wasn’t able to color this in to my liking because the pencil was hard to get in the crevices of the embossed areas. I stamped the sentiment in brown Momento ink and embossed it with clear powder. Organza red ribbon adds the final touch!
Organza ribbon, sheer and beautiful!
“Christmas Cookies” by Lisa Arana for Unity Stamp Co
Supplies I used
A homemade cookie does wonders for the heart, not just the tummy!For some reason I love gingerbread cookie images, I can’t seem to get enough of them!
Hope you find a little bit of inspiration in my vintage cards. Please visit my friends on the hop for so much more creativity and retro ideas! Don’t forget to comment on each friend to be entered to win a prize!Alaine is your next stop!
And now for the winner of November’s blog hop is Sunshine Honey bee-Melissa!!!…….Congratulations!!! Please message me with you mailing address and I will get your “thank you” prize in the mail!
Friends of Unity Blog Hop ~ December 2021
Thank you so much for visiting my blog and taking the time to see my creations. It is always a pleasure to share a bit of what I love to do. May you find joy and peace during the holiday season as I know it evokes a range of emotions in all of us. See you next month, stay safe and healthy!
Rachel
Please follow me on Instagram and Tik Tok for super short videos of how I made these cards @cardartbyrachel
“whatever is beautiful. whatever is meaningful. whatever brings you happiness. may it be yours this holiday season and throughout the coming year.”
The cue for this month is “anything but a card” and being that 99% of my stamping ends up as a card, I was excited and ready for the challenge! There are so many projects I think about trying and this really pushed me to explore new territories.
Project #1 – Travertine coaster
Super easy and fun to create, I love how they turned out! 1. I purchased travertine tiles from local home improvement store 2. Next I stamped the image with StazOn ink. It is permanent so once it is stamped it will not come off. A little scary but if it doesn’t come out there are always ways to work around it!3. Then I painted the image with colored ink and stamped on splatters for extra interest. 4. Finally I “scrubbed” on a tiny thin layer of varnish with a stiff bristle brush. It is so thin you can’t see any brush strokes.
Ink might stain the stamps. StazOn ink cleaner is available, but it is not meant for clear stamps.
.A beautiful floral image with purple StazOn ink. This is how it appears without the varnish. It has a matte look and I am experimenting to see how the ink holds up over time.
Die cutfoam circles glued to the back to prevent scratching surfaces.Cork or felt pads are great too.
Stazon ink and a bit of blue distress ink. I also painted with orange but it disappeared when I applied the varnish.
Supplies I used
Project #2 – Decorative notebook
This is another super fast project. I kept it one layered, clean and simple! 1. I cut a thick piece of patterned paper to fit the notebook. 2. Next I stamped the girl with brown and red ink, the grass I used green. 3. Then I chose two sentiments and stamped one vertically down the left side and the other across the top. 4. Finally I glued the paper onto the notebook.
Supplies I used
“…substance of things” by Phyllis Harris for Unity Stamp Company
I love how this turned out. It can definitely be embellished but sometimes it’s nice to keep things simple. I imagine taking it in and out of a tote bag, one layer makes it easy without anything falling off.
Project #3 – Memorydex file
I discovered the Memorydex about a year ago and love the possibilities it brings! I decided mine is going to be a fun file of sentiments, occasions, holidays, favorite stamp images and on and on!1. I die cut the shape of file I wanted to use. (There are 4shapes to choose from) 2. Next I stamped the turkey and the piece of paper image on the file. Icolored them with Copic markers. 3. Then on a separate paper, I stamped the turkey, colored, cut out, and popped up the main body to give the file dimension. 4. Finally I stamped the sentiment on a patterned paper die cut and glued it on.
The Memorydex
3D turkey
Supplies I used
“Turns out better” by Lisa Glanz for Unity Stamp Companyand a piece of paper stamp
Wouldn’t it be fun to trade Memorydex cards?! I see people trading ATC cards all the time. With file cards, they already have a home on the Memorydex holder!
Project #4 – Rolodex file
The Rolodex has been around for a very long time but for some reason I have always kept an address book. Now I am thrilled to change it up. 1. Keeping it simple because the area is so tiny, I chose a few stamps that will form a border. I chose an outdoorsy feel. 2. Next I blended distress ink around the perimeter as a base color. 3. Then I stamped the pine needles and the pinecone. 4. Finally I used my splatter stamp adding bits of color for interest.
The Rolodex file is for addresses. It comes with very thin files. I would love to find a punch or die so I could make my own. The most important tip I have is to leave enough blank space in the middle to fit the contact information. Also you can use the front and back, I had to be careful so that the ink doesn’t show on the other side.
Supplies I used
“Winter Blessings” by Graciellie Designs, KOTM, and “Barn Wall” by Brutus Monroe for Unity Stamp Company
Project #5 – Gift Tag
A holiday gift tag is useful and a special touch attached to a present. 1. First I die cut the tags with thick white cardstock. I die cut an additional tag out of patterned paperfor the top of the larger tag.2. Next I ink blended the background with distress inks. 3. I stamped the tree and the images directly over the background. 4. I loosely watercolored them not worrying about the background showing through. 5.After that, I heat embossed a sparkly copper sentiment. 6. Then I embellished the ornament, the hat and the bird with Stickles glitter glue. 7. Finally I added a bakers twine bow to the front of the small tag and thread burlap string through both tags for the finish.I left the small die unglued so it would have movement.
Another angleto show the sparkles
“Woodland Festivities” by Lisa Glanz for Unity Stamp Company
Supplies I used
A gift tag can also be used to adorn a bottle of wine for a dinner engagement
Project #5 – Gift Tag (part 2)
Another gift tag with a vintage feel. 1. I die cut the two tags. 2. Next I watercolored a wash of red in the area I was planning to stamp the truck. 3. I stamped the image over the paint. 4. Then I embossed the sentiment in silver on a strip of black cardstock. 5. I glued the sentiment on the small tag and wrapped copper wire around it for interest. 6. Finally I popped up the sentiment and attached charcoal string to complete the tag.
Another angle
Supplies I used
“Good Tidings” by Tierra Jackson for Unity Stamp Company
A handmade tag is a great conversation piece!
My projects for “anything but a card”was a great change of pace. I can’t wait to make more and even think of other non-card projects! Which one is your favorite and which project might you choose to make?
Thanks so much for hopping, please visit the next friend on the list for so many fun project ideas. Don’t forget to comment and you will be entered to win a prize! And now for the winner of last month’s hop is…. Mary Moisan! Congratulations Mary! Please PM me your mailing address and I will get your prize sent to you! Yay!
The cue this month is Technique! Do you have a favorite cardmaking technique? I can’t choose, I think I love them all! So I created four cards and I highlighted a technique for each one.
Card #1 – Heat Embossing
Heat embossing is an easy technique with magical results! An image is stamped with glue-like ink. Powder is sprinkled on the ink and then heated until it melts into a raised surface. If you give someone an embossed card, they’ll usually ask “How did you do that?!” For this card, I stamped the image with Versamark ink and sprinkled Brutus Monroe alabaster embossing powder over the image. Next I used distress inks to color the mittens and cocoa. I covered the stamped area and splattered white acrylic paint over the card. Keeping it clean and simple, I decided against adding embellishments!
This image gives me a crisp, cool, happy, wintery feel. The hot drink keeps the hands warm and the heart cookie fills the tummy with love!
Supplies I used
“Mittens, Cocoa and Hearts” by Angie Blom for Unity Stamp Company
This image in warm earth tones, would make a great Fall card. It would also be perfect for Valentine’s Dayin reds.
Card #2 – Stenciling
Relatively new to the cardmaking scene is stenciling! Originally one layer images, now there are stencil kits with multiple layers and coordinating stamps. To create this card, I blended distress oxide inks over tulips and poppy layering stencil sets. This is a quick, easy and fun technique producing awesome results. I used only one layer for the leaves, achieving a subtle fade into the background. This highlights the flowers. The tulip on the top right, I changed the colors to give it a new look and maybe trick the viewer into thinking it’s another type of flower! Finally, a Gina Marie border die and a popped up sentiment stamped in festive berries oxide ink.
I love this sentiment and the two fonts together go perfectly with this floral card. It’s those little moments that we remember, isn’t it?!
Supplies I used
Card #3 – No line coloring
No-line coloring gives an image a life-like effect. The idea is to color so that the outside lines disappear. Most mediums work with this technique. I began by stamping theimage with Ink On 3’s, Fadeout ink. (Any light colored ink will work.) Before taking the image out of the Misti stamping platform, I colored the eyes and nostrils on the stamp with a dark marker and stamped it over the light ink. I did this because I wanted to get all the crisp detail for the eyes. As I began painting, it works best to start from the edges. Pull paint from the edge and move the paint towards the middle with water to allow the gradient you desire. One important tip is to define the lines with as much color as possible. If you are trying this technique out for the first time, choose a simple image with large areas to color and little detail. I am practicing no-line coloring, it’s a challenge but I love the way it looks when completed.
This moose is so sweet, I love his long eyelashes. Did I tell you I have an adorable 10 lb. dog named Moose?!He doesn’t know how small he is and he thinks he is human.
Supplies I used
Cuddlebug Moose by Tierra Jackson for Unity Stamp Company
Add a few leaves for Fall, white snowflakes for Winter, flowers for Spring and blue skies and sun for Summer. This moose is a year round event!
Card #4 – Ink blending background (reacting with water)
Creating backgrounds by ink blending is one of my favorite techniques. No two backgrounds will be the same, the variations are endless. To create this card, I stamped the girl on watercolor paper. Choosing Fall colors, I blended ink onto the paper and spritzed it with water. The reaction of distress ink and water is mesmerizing. I repeated this step a few times and watercolored the girl using like colors. I stamped the sentiment and framed it with a Gina Marie die. Burlap twine wrapped twice around and a bow directly under the sentiment, finishes the card.
Autumn colors surround, as this girl gets lost in a book not thinking of anything else. The green top and green strand of hair, the mustard pants and red sneakers mimic the background. This reminds me of my daughters. One daughter has streaks of green in her hair and my other daughter has red streaks. They both love to read!
“Start Something New” by Angie Blom for Unity Stamp Company
Supplies I used
Ink blending opens the doors for creating all kinds of colorful backgrounds. I used distress inks for this card. If you haven’t tried distress oxide inks, this is a must! The oxides have a chalky appearance. When they are spritzed with water, the color reacts and layers of underlying color appears.
A card for every season, which one is your favorite?
Hope you enjoyed this stop of the hop. As much as I would like you to stay, please visit the next friend. Don’t forget to comment on each blog for a chance to win a prize!
And now for the winner of last month’s hop….Kelsey Thomas! Congratulations Kelsey!!! Please message me your information and I will send out your prize!
Thank you all so much for joining in the fun. Did you see a new technique you would like try? I hope you did and are excited to get crafting! There are so many techniques being invented and shared in the crafting community. I am invigorated and always looking forward to the next trend.
Stay safe and healthy. See you next month!
Rachel
If you would like to see short videos on how I created these cards, please follow me on the following platforms.
The Friends of Unity Blog Hop is underway! The color challenge is sage, kraft and white.
I know I said I was not going to color this card but I couldn’t resist! I stayed with brown and sage inks and left white space. I love the depth, warmth and realistic feel it gained.This was the original card. A close-upAll in all, I am glad I colored this card.
Thanks for taking a look. Let me know your thoughts on these two variations! Have a wonderful day!
Rachel
For coordinating videos, please visit me here: Instagram @cardartbyrachel tik tok @cardartbyrachel
Sage, white and kraft are so beautiful together. I had tons of fun making cards with these three colors while being challenged at the same time. I searched around my craft area for anything that fit this color scheme and got to work, happy work that is!
To all Unies here, there will be a Color Challenge album in the Unity Show & Tell Facebook group. I hope you play along! It will run from September 4th-30th. Share your card and be sure to add it to the album. There will be a lucky prize winner who will receive a $25 gift card.
When I saw this image, I was immediately drawn to it’s beauty and the open book idea. First I stamped the book on kraft cardstock with Memento ink and colored it with Berol Prismacolor pencils. I die cut the image with a scalloped edge by Gina Marie designs and trimmed off the edges. Next I die cut the wood frame and blended distress ink on it. I embossed the sentiment with Brutus Monroe alabaster powder. I also added a sheer bow in the top corner and a small piece at the bottom to create balance. Finally I splattered white acrylic paint over the top.
White pencil on kraft cardstock comes alive! It shows up brighter and more vibrant than one would imagine!
Originally I stamped the sentiment in brown ink but I didn’t think it showed up enough. The white embossed sentiment looked much better and I adhered it directly over the existing one, giving it dimension.
“Your Life Is Your Story” by Graciellie Design for Unity Stamp Company
Supplies I used
Paint splatters help illuminate the flowers without distracting. I was careful to keep the splatters fine and not too bold.
Card #2.A beautiful statement
This poppy is so large and majestic! Stamping the poppy and sentiment with Versamark ink, I heat embossed it with Brutus Monroe alabaster powder. Next I added embossing glitter over the top of the sentiment to set it apart from the flower image. Using a Copic marker, I added a touch of color in areas where I thought it needed definition and dimension. Then I die cut the top layer with a stitched border die by Gina Marie designs and framed it on kraft. Burlap twine was wrapped around the first two layers before gluing down to the white base.Finally I lightly splattered white acrylic paint on top.
I love this massive “hi.” stamp so much!
“Floral and Buds” by Angie Blom for Unity Stamp Company
Supplies I used
This is one of those images that is just as amazing with or without coloringfor so many occasions!
Card #3.Art is life
A mixed layering vibe! These girls are unique and artsy. I always have a great time filling a card up with wild abandonment! First I stamped the girls and face on white cardstock. Next, using distress inks, I painted and blended the clothes, hair, eye and surrounding areas. Moving on, I die cut the two opposing corners and blended oxide ink on the cardstock underneath. Roughing up the edges was next in order with a scissor blade to give it a grungy feel. Then I stamped the sentiment, die cut it out and ink blended the edges.Finally burlap twine tied on the left for the finish. Oh, I also added Stickles for the outfits and 3D Crystal Laquer on the martini glass and eye!Whew all good – it’s alot going on but fun to look at I hope.
A little Stickles adds an extra sparkle and bling on the outfits.
What is the meaning behind this face? I don’t necessarily have a story to tell, I just thought it looked cool. I would love to hear your interpretation of what this face means to you!
Supplies I used
“Windows to the Soul – Large” by Donna Downey and “Party Girls (fashionista)” by Tracy Malnofski for Unity Stamp Company
This sentiment is truly amazing. It brings so much depth and meaning to the card.
Card #4. A happy thought
This bird has the sweetest expression on it’s face, I can’t even… I stamped the image on a curvy shaped die from watercolor paper. I was careful not to ink up the tree limb edges too dark. I wanted the edges to blend into the background as much as possible. Next I painted the bird which is so quick and fun to paint. I placed a small piece of washi tape to cover the lower part of the trunk and then wrapped burlap string around the bottom. I die cut the sentiment in kraft and added a bit of darker distress ink. A sequin embellishment added for balance.
Another view of the adorable little bird.
Supplies I used
“You’re You” Uniquely Unity kit for Unity Stamp Company
Loving this sentiment die by Unity Stamp Company.
Card #5.We got this!
I used four kits to create this card. When I started I told myself I was going to make a card that didn’t involve coloring. I love it, but it has taken every ounce of restraint to keep from coloring these images. (I still might) I stamped directly on the card base. I picked out some Angie girls I thought would be interesting and fit in with the shapes of the empty space I imagined. Also I knew I wanted to use this sentiment so I planned ahead where it was going to go.I stamped the sentiment and framed it with a thin edge of kraft and sage. Finally 1mm burlap twine and a clear jewel embellishment for the finish. Maybe the recipient can color it if I don’t!
Another angle
Supplies I used
“Catherine, Cecilia, Anna and Selfiegirls” by Angie Blom for Unity Stamp Company
“Together anything is possible” Yes this is so true!
Card #6.Take a moment
When I think of kraft cardstock, coffee is what comes to mind. The corrugated sleeves to keep our hands from getting too hot from the freshly brewed coffee! Excited to create a coffee scene,I stamped these images with rich cocoa Memento ink. I masked off the girl and then stamped the cafe. Next I colored the girl with Copic markers and ink. I lightly washed over the cafe blurring the lines to soften the background. I used coffee stain stamps, placing one around the sentiment. I also added 3D Crystal Laquer on her eyeglasses. This scene is trimmed with a Gina Marie border die and adhered to kraft. Finally I added washi tape on the fold and wrapped it around to the other side. I added swatches of color on the edges of the card to tie it all in.
Glasses shiny and realistic looking with the 3D Crystal Laquer.
A fun sentiment that is actually quite true for myself. I go to bed every night looking foward to my coffee in the morning!
“Coffee Helps” by Jessica Pickeral and “Cafe Delights” by Angie Blom for Unity Stamp Company
Supplies I used
One more view before I go and get a coffee!
The cards I made for this hop all in one!Which one is your favorite?
Hope you enjoyed this stop! Please hop to the next Unity friend below.
Don’t forget to comment, I will randomly choose one person to win a prize. The winner will be announced during next month’s blog hop! The winner for last month (August) is……. Robin Stanton!!!……. Congratulations Robin! Thank you so much for your comments, we appreciate you! Please message me your mailing address information so I can send out your prize!
September is here and as much as I love summer, I am going to try to welcome autumn with open arms! A good way to look at this change of seasons is the beautiful fall leaves that will surround and the more time for staying home and cardmaking! I like that!
I hope you found some fresh ideas and new styles to try. I am looking forward to seeing your cards this month for the color challenge! The album will be on the Unity (show and tell) Facebook page. Please let me know if you have any questions about my cards. I will post coordinating videos on instagram for every card you see here in the hop!
Take care, stay safe and healthy!
Rachel
Instagram@cardartbyrachel
Tik Tok @cardartbyrachel
“Creativity is inventing. experimenting. growing. taking risks. breaking rules. making mistakes. and having fun.” Mary Lou Cook
Here is my first card.Sometimes a ride is relaxing and frees the mind!
This card was fun to make. I stenciled in the sun rays and die cut the border. Next I stamped the image and sentiment directly over the rays. I used Copic markers to color the motorcycle and the bits of rays showing through the image add interest. Then I mounted the front onto a thin yellow border and adhered it to a white card base. Finally I added 3D Crystal Laquer to the headlight giving it a glossy finish.
A close-up
Supplies I used
Ride it out by Angie Blomfor Unity Stamp Company
I love this motorcyle image because it has a unique viewpoint.
Card #2. What better way to celebrate than going off road?!
Yes, we are having a blast! Using Versafine black ink, I stamped the jeep on white cardstock with a die cut border and heat embossed it with clear embossing powder. I colored the jeep with salty ocean and blueprint sketch distress inks by Tim Holtz. Next I stamped the jeep a few more times using the 2nd generation technique. This technique is when a stamp is inked up and stamped on a separate piece of paper. Then without reinking, the image is stamped on the card to make it lighter and less precise. I heat embossed this with Ranger silver embossing powder. Last I created 3 sentiments and adhered them to the card at various angles.
Close-up of the sentiments
Close-up of the jeep
Supplies I used
Stamps I used
I love how bold this image is….so full of adventure and action!
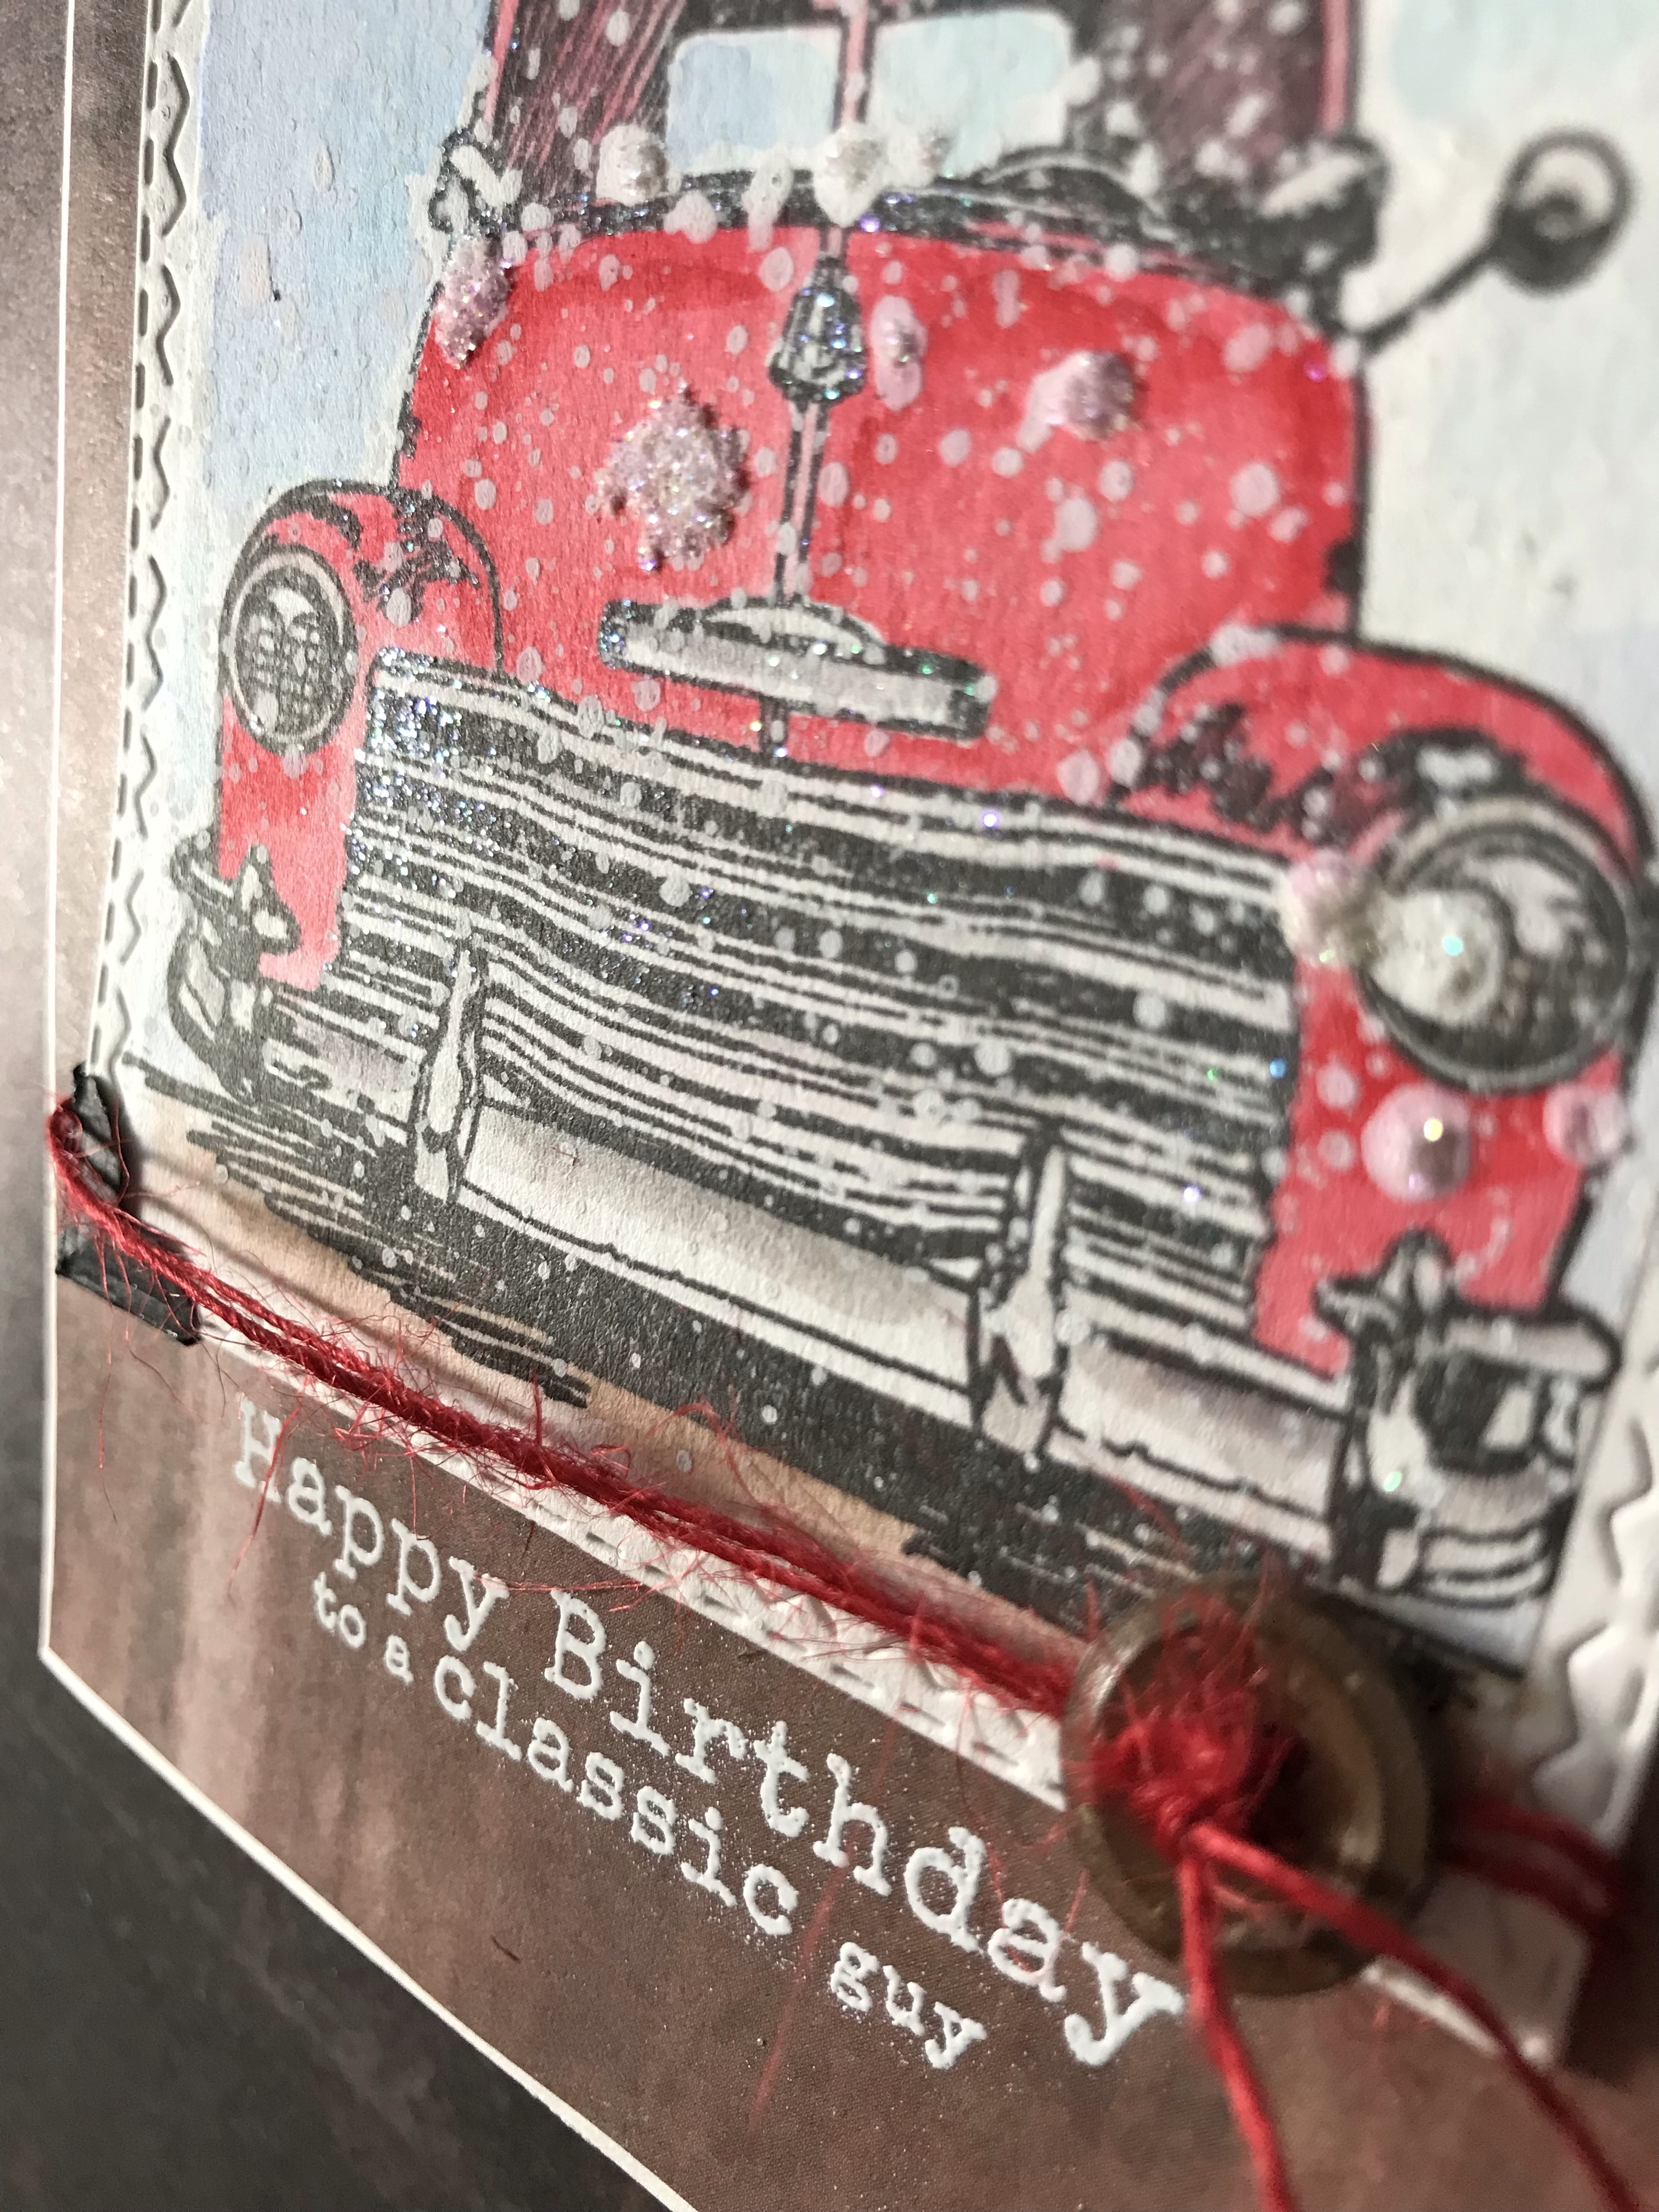
Card #3. The first snowy ride of the season with beautiful huge snowflakes coming down!
So many cards are being posted with a holiday theme. I am not quite ready for this trend but I did create a snowy, wintery birthday card. I began with a stitched square die cut from watercolor paper. I stamped the image and painted the truck and sky with distress inks. Next I splattered white acrylic paint all over the truck. Then I chose a printed piece of patterned photo paper and embossed the sentiment on it using white alabaster embossing powder by Brutus Monroe. Finally I added two photo corners and red twine with a button.
Do you see the glitter in the snow?
A close-up
Supplies I used
Slowly Turning Classic by Tierra Jackson for Unity Stamp Company
This snowy card is getting me ready for the holidays!
Card #4. Happiness is a vintage truck and a load of cut flowers!
One of my favorite cards to make is that with a vintage feel. I love this truck paired with a bed full of beautiful flowers! First I stamped the sentiment and image with brown Memento ink. Next I colored the image with Copic markers. Then I die cut out the card front with a Gina Marie die. Finally I added a pretty organza ribbon and three copper flowers. I created the wire flowers by wrapping the wire around my finger or a small end of a paintbrush etc. depending on what size you want. I pressed the wire flat and fanned it out gently to create a flower shape.
I used fine copper wire to make these flower-like embellishments.
I added tons of Stickles glitter to the flowers!
Supplies I used
Truckload of Blooms by Tierra Jackson for Unity Stamp Company
I love an old vintage truck paired with beautiful sparkly blossoms!
Cards I made for the hop. Did you notice each card kind of represents a season?!I didn’t plan this but thought it would be fun to mention it!
Here are the Friends of Unity to continue along the hop.
Please don’t forget to leave a comment. I will randomly pick one person to win a surprise! I will announce the winner on the next Friends of Unity Blog Hop. The winner for July is…..allibamabell…..Congratulations! Please message me your mailing address and I will send you your prize!
Thanks for hopping along with us. Please let me know if you have any questions. Until next time, have a wonderful month full of sunshine, good health and vitamin D!
Rachel
You can also find me on instagram @cardartbyrachel and tik tok @cardartbyrachel. I will post short videoson how I made these cards.
“Sometimes the besttherapy is a long car ride and music.” Shannon J.
Hi and thank you for hopping with us! What a fun time to connect with the Growing In Unity friends!
I can’t get enough Summer vibes that I am feeling after one of our longest winters.
Just a peaceful, relaxing day at the beach. I love this kit and I thought it would be fun to make a light and airy card that isn’t complicated but still delightful. I stamped the image on a scalloped die cut. I blended distress oxide inks over the image to create a hint of sun peaking through. Next I stamped the sentiment on a smaller die and also blended inks around the edge to mimic the larger piece. I used pattern paper for the background and again blended ink on the edges. Then I adhered the sentiment and the patterned paper to white for a bit of contrast and crispness. Finally coral twine wrapped around the white layer completes the card.
This sentiment is carefree and beautiful
Live in the Sunshine – Whit Kit June 2020
Supplies I used
The card on the right I previously posted for The Friends of Unity Blog Hop last month. I love showing the warm vs. cool colorschemes. Choosing colors can really change the mood of the card!
I’m feeling refreshed and contentwith the breeze blowingin my hair
I’m feeling the warmth of the sun and the hot sand on my toes
One more look
Thanks again for stopping by. Don’t forget to visit each of these awesome cardmaking friends!